NS Basic/CE
Tour
|
|
NS Basic/CE |
This tour has screen shots from NS Basic being run on an HPC device. On a Pocket PC, the screens are reformatted for the diifferent screen size and user interface automatically.
The Edit View
|
After starting NS Basic/CE, you'll what looks like a standard text editing view. Into this, you'll type your program. Don't worry too much about getting the spacing right: there's a Format command to make things pretty. |

|
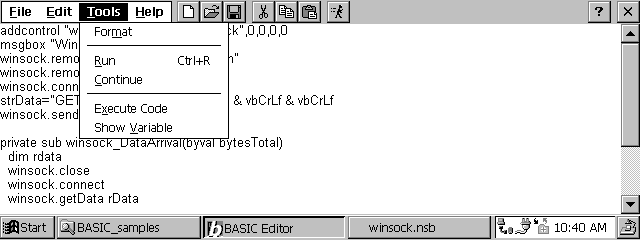
Once you've got your program entered, tap RUN (or the icon of the running man in the titlebar, and your program will create the Output View and execute immediately. |
|
If your program has an error, it will return to the Edit View and highlight the line of code where the error occurred. |
|
There are a few tools to help you debug. The Continue command will bring up a list of functions and subroutines, letting you choose one to resume execution. Execute Code lets you type extra lines of code for immediate execution, without modifying your program. Show Variable will display the current value of any variable.
Overview |

|
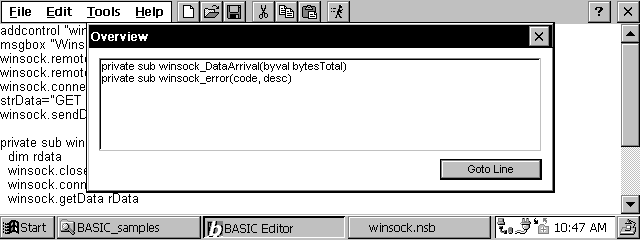
Overview is a feature that lets you move around your program quickly. It puts up an alphabetic list of all your functions and subroutines. Tap one, and the Edit View will scroll to that function or subroutine. |
|
|
|
The Output View
|
|
Here, we'll show you some code snippets and the resulting output on the screen. |
|
We will begin with everyone's favorite first program. This is as easy as it gets, anywhere. |
|
|
|
|
The inputBox function is a handy way to get input from the user. Here's how it looks - note that statements can be of any length. |
|
|
One of the most important objects in NS Basic/CE is the PictureBox. With it, you can create buttons, graphics and display text and pictures. This screen showshot shows a number of these things going on. The name of the base Output View is output. You can add additional objects on top of the Output View. |
|
|
There a number of built in dialogs for standard operations, such as color, font, save, select file and help. Here's how to select a font: |
|
|
One of the fanciest objects you can use is the Grid. It can be used to organise data in tabular form, such as a spreadsheet might. The cells are clickable and the values can be set from within your code. |
|
© NSB Corporation. All rights reserved.
Features and specifications subject to change.