|
|
Tech Note 31: e-PocketSetup Express (obsolete)November 27, 2008© NSB Corporation. All rights reserved. |
Important: The owners of e-PocketSetup made the following statement on November 26, 2008:
"Allegro Wireless Canada Inc. (Allegro) purchased all rights to the
intellectual property of e-pocketsetup from its owner in 2007.  As such,
Allegro did not purchase the company nor its liabilities or obligations.
Any sales that transpired post February 2007 directly with Allegro have
been supported and will continue to be supported by Allegro.  However,
sales not done through Allegro are considered to be the liability of the
selling entity, as Allegro was not involved in any way."

If any of your customers contact you, please continue to tell them to
direct their inquires to our email address orders@allegrowireless.com.
If you need to reinstall e-PocketSetup and you bought the product before February, 2007, Allegro will not be able to help you. joespan123 has kindly provided a workaround.
e-PocketSetup is probably the best tool to create installers for Windows CE currently available. It's powerful, it has unique features for NS Basic users and is continually improving. It also works well for desktop apps: the NS Basic/CE installer is built using it. e-PocketSetup is a commercial product.
ePocketSetup Express is sufficient for most NS Basic/CE applications. e-PocketSetup Express is an simple and quick tool to create, manage and deploy single-platform setup projects for Windows Mobile. Easy to use, it was designed for all developers that want to create modern and sophisticated setups without needing to distribute all-packages-in-one setup programs or customize the interface and setup actions.
In this Tech Note, we will give you the information you need to set up an installer for a typical NS Basic project. e-PocketSetup has many additional features: please consult the documentation of the product for more information.
To save space, we'll refer to e-PocketSetup Express as ePSX from now on.
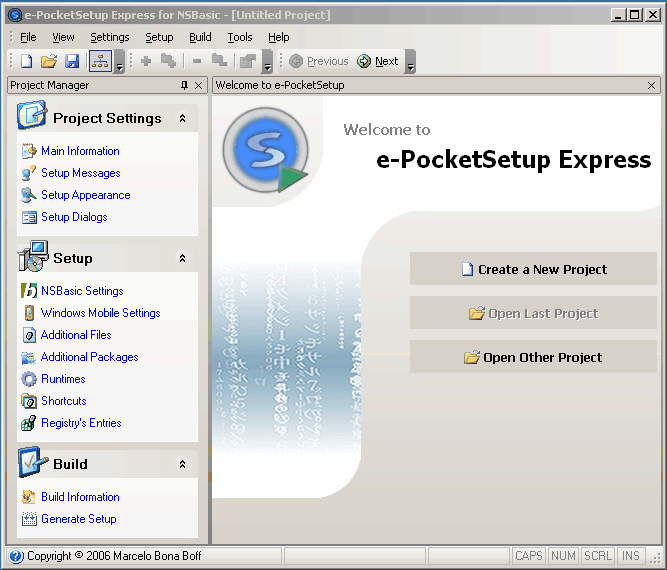
Start ePSX. You'll see this screen:
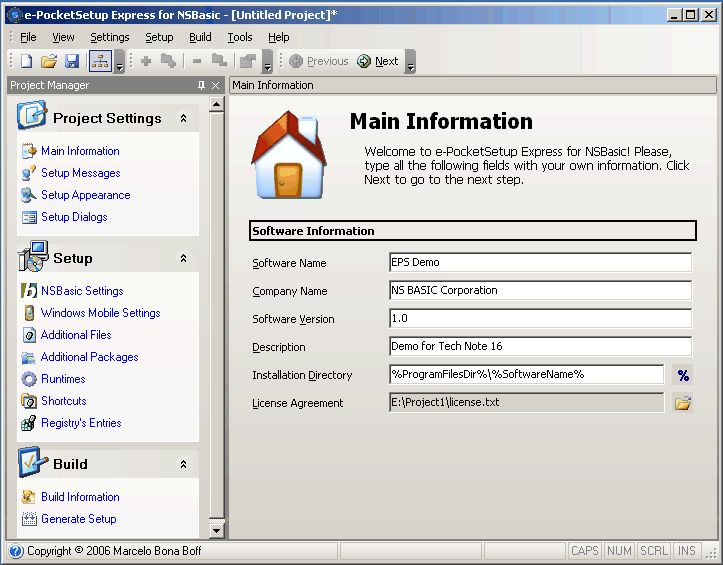
You can further customize your installer by going into Setup Messages, Setup Appearance and Setup Dialogs. For a simple installer, there is no need to do so.
e-PocketSetup Express comes with a copy of the NS Basic runtime installer which is put into \Program Files\e-PocketSetup Express\Data\NSBasic\(rev)\(filename).Cab. If you are using the current version of NS Basic/CE, it is likely that a newer version of the runtimes exist. You need to copy these into this folder.
To get the CAB files out of the latest version of Runtime.ppc.exe (or other installer), run it. This will unpack the CAB files and put them into \Program Files\Microsoft ActiveSync\Runtime (or the name of other installer). Copy these files over the ones in e-PocketSetup.
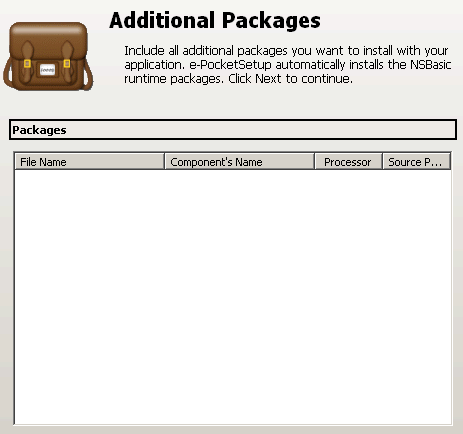
The runtime that is installed the same as Runtime.ppc.exe: it does not install any additional controls your program may use. You can add these in Step 5.
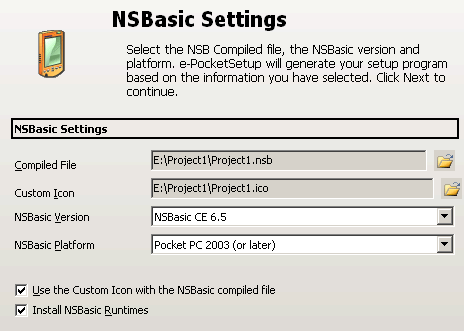
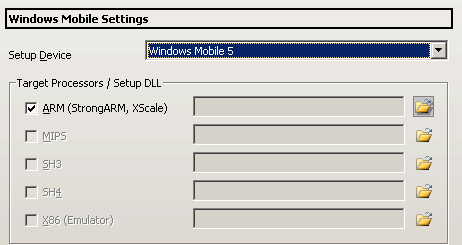
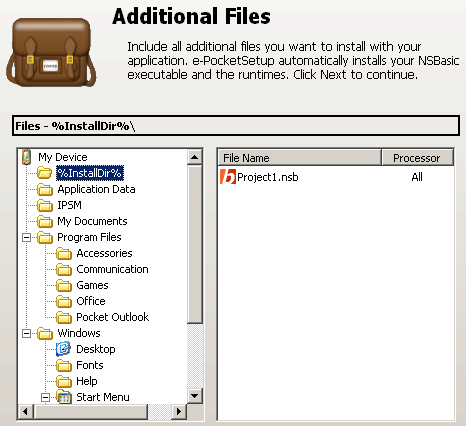
If your app has additional files, such a group of images, you can right click on %InstallDir% and add a subfolder. Add your files to this subfolder.
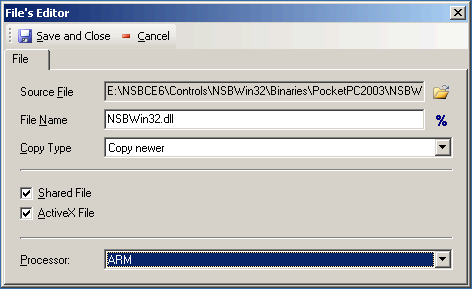
If you have controls (.dll or .ocx) files you need to install, put them in \Windows. After you have added them, right click on the filename and select File Properties. You'll see this window:
From Mike Trainor:
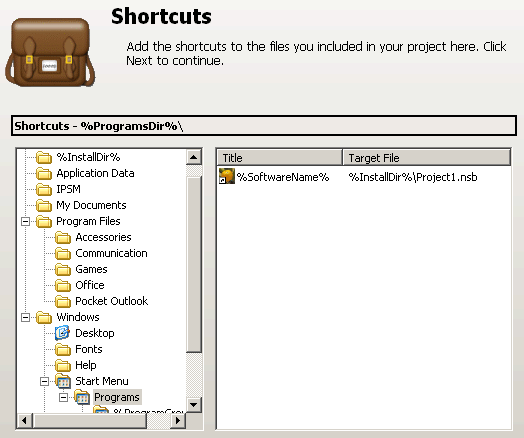
The wizard only allows for one shortcut, but if another is needed, simply create the shortcut on your Pocket PC. Copy the file from \windows\start menu folder to your desktop. Then add it to the list of files to be installed by epocketsetup with the destintation being \windows\start menu.
How to reinstall e-PocketSetup
From joespan123:
For those lucky people who actually did purchase a copy of ePocketSetup you may come into trouble if you ever have to re-install the application on your computer if you ever have to rebuild your PC.
ePocketSetup registration and purchase of a license worked as follows:
1) You install the trial software say "eps4_trial_v4.1.0.1.exe". This was cobbled and would fail to work after a time period.
2) You had to purchase a license to turn the trial software into a valid install.
3) Once you made the purchase you had to download and run a file called "regwizard_v4.1.0.1.exe". You also recieved a license file with Name, Company and Registration key.
4) This "regwizard_v4.1.0.1.exe" when run gives you the option to "Activate by Internet" or "Activate by Email".
5) You then enter in the supplied Name, Company and Registration key provided in step 3.
6) When you enter the license details, the "regwizard_v4.1.0.1.exe" will contact ePocketSetup and verify your license.
7) Once your license details are verified, "regwizard_v4.1.0.1.exe" will proceed to install files to turn the ePocketSetup from a trial software to a registered software.
8) Once step 7 is complete you will have a regisitered ePocketSetup installed on your PC.
Now given the ePocketSetup website and the author is unavailable you will be stuck if you need to re-install the software. You will not be able to run the "regwizard_v4.1.0.1.exe" to authenticate your license.
Here is the way to save yourself from this predicament.
When ePocketSetup succefully authenticates your license it installs all the files required to turn the software from trial to registered.
There are numerous files installed but the one file that is installed that really counts is the actual ePocketSetup executable. This is "SetupMgr.exe".
To actually use the following method to restore ePocketSetup onto a PC that has been rebuilt you first need to satify:
a) Have the original "eps4_trial_v4.1.0.1.exe" trial software. This is required to be installed as it may well install required DLL's into the windows system32 directory and other places.
b) Have ePocketSetup fully installed and functional on the PC and you must have a licensed version.
To make a backup of the installation do the following:
1) Keep the "eps4_trial_v4.1.0.1.exe" install
2) Zip up the "C:\Program Files\e-PocketSetup 4" install folder.
3) Using RegEdit, backup the following registry entries:
[HKEY_CURRENT_USER\Software\MB]
Now do the following to restore the backup:
1) Install "eps4_trial_v4.1.0.1.exe"
2) Overwrite the "C:\Program Files\e-PocketSetup 4" with the backed up copy.
3) Install the saved registry entry "[HKEY_CURRENT_USER\Software\MB]". This will also contain your license key.