
|
|
Tech Note 23: Using the Microsoft Device Emulator
|
The MDE is a true emulator: it uses an actual ROM image, as would be installed in a device, within an ARM emulated environment. As a result, the quality of the emulation is excellent. Since it interfaces to NS Basic/CE via an ActiveSync connection, it is easy to load software on to and control.
You'll need a fairly fast desktop system to get performance anywhere close to a real device. Using the standard NS Basic/CE Benchmark program, it scores 9013 on a 3 ghz desktop CPU, a bit more than 1/3 the speed of an actual device with a 300 mhz ARM processor. Microsoft's ActiveSync also has to be installed, to transfer your program to the emulator once it is running.
Note that the downloads are large. If you do not have a broadband connection, you are better off getting Virtual CE to connect to an actual device. You need to be running Windows 7, Vista, XP or 2000 with the latest service packs. For XP and 2000, you need to be running ActiveSync 4.5. For Windows 7 or Vista, you will need Window Mobile Device Center 6.1 or newer.
Throughout this Tech Note, we will use the term ActiveSync interchangeably with Windows Mobile Device Center.
Microsoft also has a tutorial on their site.
A. Download the Microsoft Device Emulator 3.0:
http://www.microsoft.com/DOWNLOADS/details.aspx?FamilyID=a6f6adaf-12e3-4b2f-a394-356e2c2fb114&displaylang=en (1.1 megs)
B. Download the images. For NS Basic/CE, you'll want the Professional Images. The Standard Images are for SmartPhones only and will not work with NS Basic.
They are available in quite a few different languages. Note the English is not listed at the top of page, but listed further down.
C. You may also need to install Microsoft's Virtual Machine Network Driver. It is installed as part of Virtual PC 2007. http://www.microsoft.com/downloads/details.aspx?FamilyId=04D26402-3199-48A3-AFA2-2DC0B40A73B6&displaylang=en
Be sure to follow Microsoft's instructions for installation. It is not unusual to have to reboot. If ActiveSync does not connect, try registering the Device Emulator again.
If you have questions, Microsoft has a newsgroup for the Emulator here:
http://forums.microsoft.com/msdn/showforum.aspx?forumid=76&siteid=1
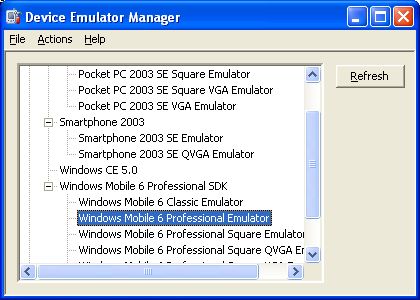
An easy way to start an emulator is from the Windows Start button. For example, find Windows Mobile 6 SDK, Standalone Emulator Images, then choose the emulator you wish to start.
Next, start the Device Emulator Manager. You'll find it in c:\Program Files\Microsoft Device Emulator\1.0\dvcemmanager.exe. You might want to pin this to the Start Menu for the future.
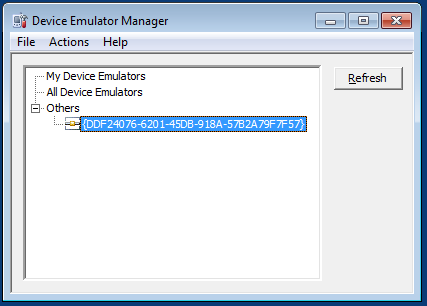
Now, right click on the GUID. One of the options will be to cradle. Choose that, and the Emulator will connect to your computer, just as a real device would.
The last step is to establish an ActiveSync connection. In Connection Settings, make sure that connection via DMA is specified.
There is some useful documentation in the Emulator under its Help menu. It describes a number of useful options, include setting up a folder that can be shared with the desktop.
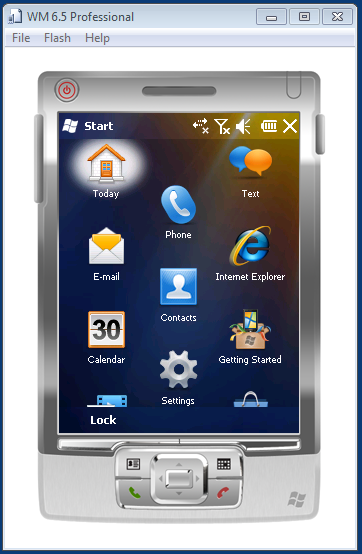
All that is left to do is install your program. Do it just as you would to a real device: Choose Start under the Run menu, or hit F5.
The emulator can be launched from the command line, giving additional options. For more information, check this document.
Here is a sample to start up a Pocket PC 2003 device with 128 megs of memory. (You'll need to have the appropriate images and files installed).
"C:\Program Files\Microsoft\Device Emulator 2.0 Preview\DeviceEmulator.exe" "C:\Program Files\Microsoft Visual Studio 8\SmartDevices\Emulators\Images\PocketPC\2003\VGAPortrait\1033\PPC_2003_SE_VGA_WWE_ARMv4.bin" /n /defaultsave /skin "C:\Program Files\Microsoft Visual Studio 8\Smartdevices\Skins\PocketPC_2003\PocketPC_2003_VGA\1033\PocketPC_2003_VGA_Skin.xml" /memsize 128Here is another command line for starting the emulator in German:
deviceemulator ppc_ger.bin /flash save.bin /memsize 128 /sharedfolder storagecard
Install the Windows Mobile Emulator. You can download it here:
http://www.microsoft.com/downloads/details.aspx?FamilyID=1a7a6b52-f89e-4354-84ce\-5d19c204498a&displaylang=en
Start the Emulator. Select the desired Windows Mobile OS by right mouse click and then click "Connect".
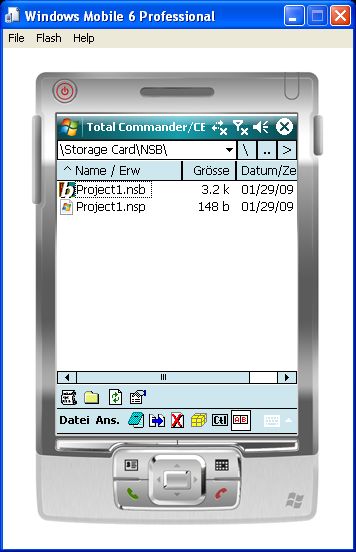
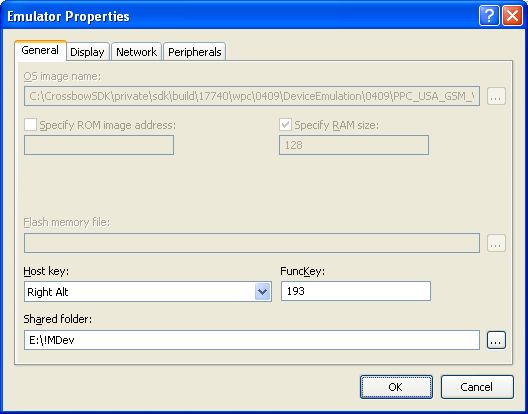
Click on "File" and then on "Configure". On this picture you see Windows Mobile with the Total Commander /CE started. It is absolutely great and it's freeware. You can download it here: http://www.ghisler.com/ce.htm
You will see this screen. Under the Tab "General" go to "Shared Folder" and select the folder on your Desktop PC where your NSB application resides. This setting emulates a SD Card on your emulator image. Click OK to save the settings.
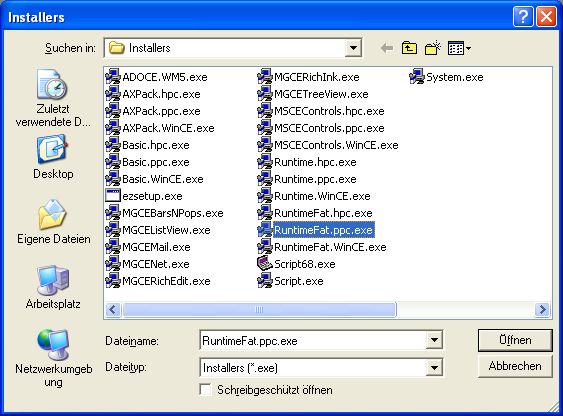
Now you have to install NSBasic to the emulator just as you would to a normal device. Copy the cab files to your virtual SD card and execute them from the emulator. After this the emulator will have associated the nsb extension with the NSBasic.
You find the cab files in one of the following directories:
If you have not installed the Runtimes to a device yet then proceed as follows:
If you are using additional controls these too have to be installed to the emulator. This can be done without a device being connected.
Next close the emulator and save the settings.

When you restart the same emulator image the next time it will start with the same settings and programs installed.