Tutorial 04: Doing a Popup
May 01, 2008
© NSB Corporation. All rights reserved.
Contributed by Mike Featherstone
|
Tutorial 04: Doing a PopupMay 01, 2008© NSB Corporation. All rights reserved.Contributed by Mike Featherstone |
NS Basic offers a number of embedded control types that may be utilised by applications. Most of these will be instantly familiar most programmers.
As a development tool, NS Basic provides a graphical interface enabling the developer to select, position and configure these controls for use within their applications.
One such control is a Popup. This provides a visual queue (popup trigger) to the user that, when tapped on, opens into a list of options allowing one to be selected for use. This tutorial aims to describe the process required to create, configure and use a popup using NS Basic.
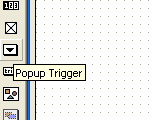
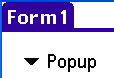
Creating a popup is a simple as Selecting the 'Popup Trigger' tool in the IDE and clicking within the confines of the form designer to place it at the cursor position. As with all NS Basic controls, if you get the position wrong or you just fancy your popup somewhere else on the form, Popup triggers may be moved at any time by selecting, dragging and dropping them.
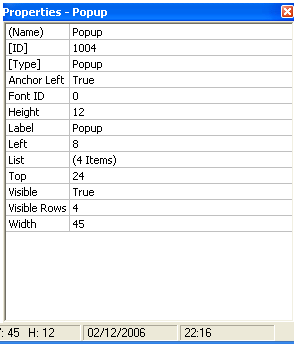
On creation, there are two properties of a popup to be immediately concerned with:
(The position and size of the popup may also be defined textually in its attribute table if required.)
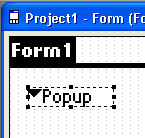
Exercise: Starting a new NS Basic project, create a popup named and labelled 'Popup' and position it where required on the default form.
Once created, a popup needs to be populated with data i.e. all the textual options to be displayed when the popup trigger is tapped need to be defined. Entry of this data is achieved by selecting the 'List' item in the Properties box and tapping on the button at the end of that line which opens a dialog box entitled 'List Items' into which popup options may be entered (one per line).
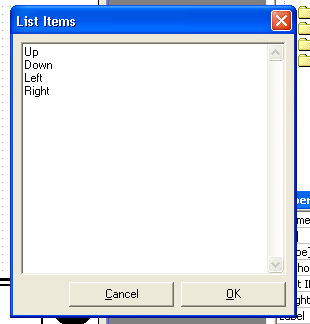
Exercise: Populate the popup previously created with the following items 'Up', 'Down', 'Left', 'Right'.
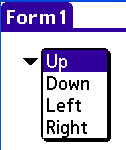
At this point, it is possible to compile and execute a basic popup (though it won't actually achieve a lot). When run, the popup will be presented as 'clickable'. Clicking will open the selection window, presenting all of the data options previously defined.
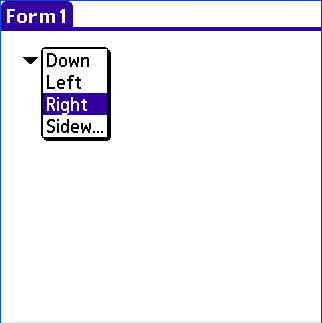
Exercise: Compile the project and install on a device. Manipulate the popup to demonstrate its functionality. Here is how it should look:
In order to do something useful with a popup, it's necessary to determine from within the enclosing application exactly which item has been selected. In NS Basic, Popups support a method entitled 'Text' which will provide this information into a 'String' variable and another, entitled 'Selected' which will return the integer value of the selected item i.e. its position in the list of items that is presented.
Exercise: Double tap on the popup in the IDE Form to open the associated code window and paste the following code into it. Recompile the application and run it, selecting any of the options to see that the corresponding text and positional indication is displayed at the bottom left of the screen.
	Dim Chosen as String
	Dim Picked as Integer

	Chosen = Popup.Text
	Picked = Popup.Selected

	DrawChars Chosen, 20, 40
	DrawChars Str(Picked), 20, 60
Once data has been read from the popup in this way , it may be manipulated or stored in the same manner as any other variable of the same type.
Having looked at the entry of data using a popup and stated that this data may be manipulated and stored as required, we need to consider the case where it is required to reconfigure the popup display based on that stored data i.e. if we read and store something then exit the application, we ought to be able to load the data from storage and set the popup to the same display state once we restart the application.
There are two ways of approaching this, each of which provides a slightly different result.
The simplest approach is to use the 'Text' method and set it to the same value as was read from it initially.
Exercise: Add the following code to the 'After' code module associated with the default form then recompile and test the application (i.e. start the application and confirm that 'Down' is displayed in the popup).
Popup.Text = "Down"
On first glance this approach seems fine as the popup displays the required text on startup. Tapping on the popup and opening the list reveals a problem however. The item highlighted in the list is not the same as the text displayed in the popup - we've changed the displayed text but not the actual selection. To do that, we need to modify the 'Selected' method. (Changing the 'Text' method like this should only be considered as a means of setting up a popup 'Label' programmatically)

Exercise: Open the 'After' code module and modify the content to read as below. Compile and run this version of the application.
	Dim Chosen as Integer

	Chosen = 3
	Popup.Selected = Chosen
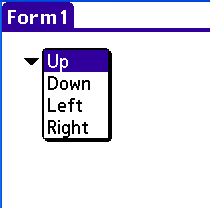
It should be clear that 'Popup' is now set to 'Left' every time the application is started, as is the selection displayed when the popup is tapped on. (In this case it's being set to a constant value, in reality, it would more likely be set to a value loaded from storage). Configuring the control in this way has the added impact of sizing it appropriately on the display for the text it is configured to contain. This is particularly noticeable when the content of the popup is not 'left justified'.


Using the 'Selected' method in this way has the obvious disadvantage that, being a number, its result is not instantly usable for display outside the body of the popup itself. To get around this, without requiring the developer to read both the 'Text' and 'Selected' states of the popup and store them, NS Basic supplies a further method 'ItemText' which provides a means of indexing into the 'list' items associated with the popup.
Exercise: Open the 'After' code module and add the extra line described below. Compile and run the application.
	Dim Chosen as Integer

	Chosen = 3
	Popup.Selected = Chosen
	DrawChars Popup.ItemText(Popup.Selected), 20, 60
Running this application should result in 'Left' being displayed at the designated position on the screen as well as in the popup itself.
As well as those already described, popups support additional methods allowing both their form and content to be manipulated programmatically as well as at design time. These functions are as follows:
Exercise: Open the 'After' code module associated with the default form and modify the code to read as shown below. Compile and run the application to see the effect of the Add and Delete methods on the content of the popup.
	Dim Chosen as Integer
	Chosen = 3

	Popup.Selected = Chosen
	Popup.Add "Sideways"
	Popup.Delete 1