Tutorial 05: Using a Function in a Module
May 01, 2008
© NSB Corporation. All rights reserved.
Contributed by Ted Beauchamp
|
Tutorial 05: Using a Function in a ModuleMay 01, 2008© NSB Corporation. All rights reserved.Contributed by Ted Beauchamp |
This tutorial will explain how to create a function in a stand-alone module that can be accessed from any point in your application. The advantage of creating a separate module is that it can then easily be added to new projects by simply adding it to your project. To add an existing module, click on the Project menu, and then click on Add Existing Module.
Before we create the new function, we first need to create some controls to let us select the information the function will need.
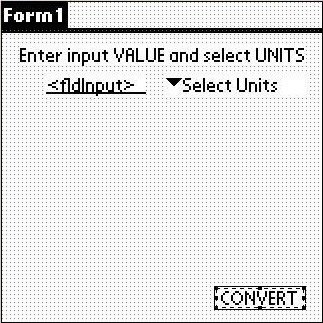
Start a new project, change the name to Temperature Conversion. On the main form add a label lblInput. Position it at the top of the form as shown. Change lblInput's label to "Enter input VALUE and select UNITS".
Now add a field called fldInput and a popup selector called popUnits. Position them below lblInput. Change the label for popUnits to "Select Units".
These will be used by the user to enter values that the temperature conversion function will need.
Now select the button tool from the IDE toolbox and add a button. Change the name to btnConv. Change the label to CONVERT.
Your form should look like this now.
Now that we have our form, we can begin to add code. In the Project Explorer pane, select the form and right click to bring up the menu. Select "View After Code". In the code window add the following lines between the Sub and End lines:
	popUnits.Clear
	popUnits.Add "Celsius C", 1
	popUnits.Add "Kelvin K", 2
	popUnits.Add "Rankine R", 3
See the NS Basic manual if you need more information on what these commands do.
Navigate back to the form and double click on the CONVERT button to open it's code window. Add the following lines between the Sub and End line:
	Dim InUnits as integer
	Dim InVal as float
	InUnits = PopUnits.selected
	InVal = Val(fldInput.text)
These lines creates an integer variable for unit we are converting from, Celsius, Rankine or Kelvin, and also a float variable for the value we are converting. The values are taken from the PopUnits.Selected property and the text in the fldInput field, which is converted to a numeric value by the Val function. These values will be passed to the Convert function as arguments.
Now add this line of code below the others
	MsgBox "The converted answer is " + str(convert(InUnits, InVal))_
	+ " Degrees Fahrenheit"
This line tells the program to send the two arguments to the function called Convert and return the result of the calculation.
When you create a function remember that the function always returns a single value of the variable type defined in the function.. This value is returned as the name of the function. Your calling code should handle the returned value as necessary. In this example the code takes the value of Convert changes it to a string (str) and adds it to the message box text.
Many programmers actually treat the function name as a variable, placing it directly into the equation with it's neccesary arguments. The program will perform the function, calculate the results and place it into the equation as it is calculating the answer.
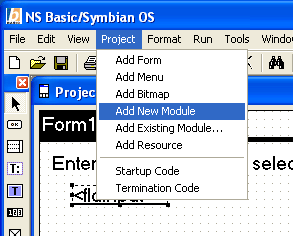
To add a module to the project click on "Project" in in IDE menu. Select "Add New Module".
 This will open a new code window.
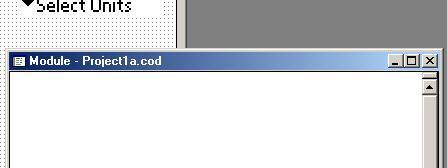
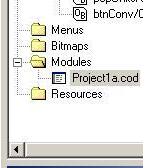
A new module also appears in the project explorer
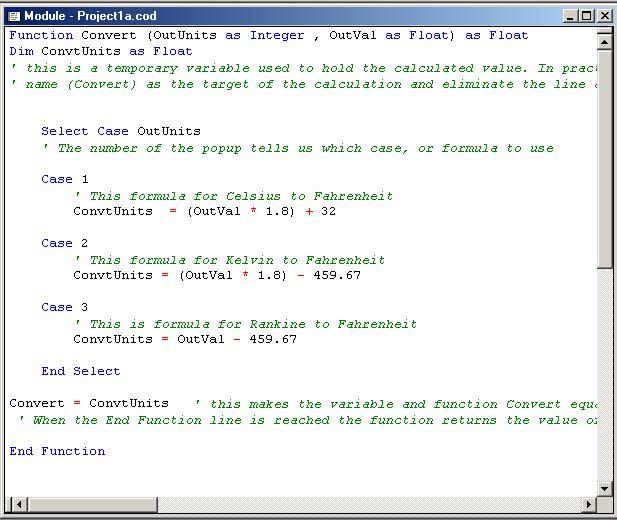
In the new code window add the following line of code:
Function Convert (OutUnits as Integer , OutVal as Float) as Float
This line defines a function with the name Convert. It is helpful to think of this as also creating a variable named Convert of the data type specified at the end of the line (Float). In our example it also creates two other variables, OutUnits (integer type) and OutVal (Float). These will recieve the values from the arguments in the calling statement. You can have as many additional values here as needed provided you supply the values in your calling statement. The function always assigns the values to these variables in the order they are listed.
So in our example using the lines of code from the Convert button,
InUnits is assigned to OutUnits, and InVal is assigned to OutVal. Note that the variable type being sent must match the type defined in the Function line.Now that we have the values, we need to add some code to calculate the converted temperature. Add the following lines to the code window:
Dim ConvtUnits as Float
' this is a temporary variable used to hold the calculated value. In practice it is normal to use the function
' name (Convert) as the target of the calculation and eliminate the line after End Select below

	Select Case OutUnits
	' The number of the popup tells us which case, or formula to use

	Case 1
		' This formula for Celsius to Fahrenheit
		ConvtUnits  = (OutVal * 1.8) + 32

	Case 2
		' This formula for Kelvin to Fahrenheit
		ConvtUnits = (OutVal * 1.8) - 459.67

	Case 3
		' This is formula for Rankine to Fahrenheit
		ConvtUnits = OutVal - 459.67

	End Select

Convert = ConvtUnits   ' this makes the variable and function Convert equal to the calculated value
 ' When the End Function line is reached the function returns the value of Convert to the calling code.

End Function
The final code window then should look like this.
Save your project. First NSBasic will ask you to give a name to the function module. Give it a descriptive name like TempConv. You can use this function in other projects by adding it to the project. To add an existing module select "Project" from the IDE menu, and select "Add Existing Module" from the drop down menu. The modules are stored by default in the projects folder of NSBasic with .cod extensions.
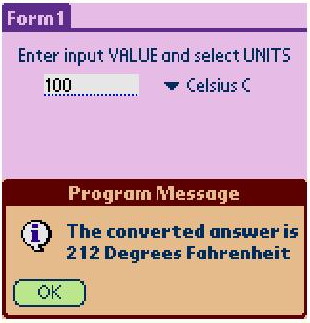
Compile, download and run. You should be able to select a temperature scale and value and get the correct Fahrenheit conversion when you tap OK.